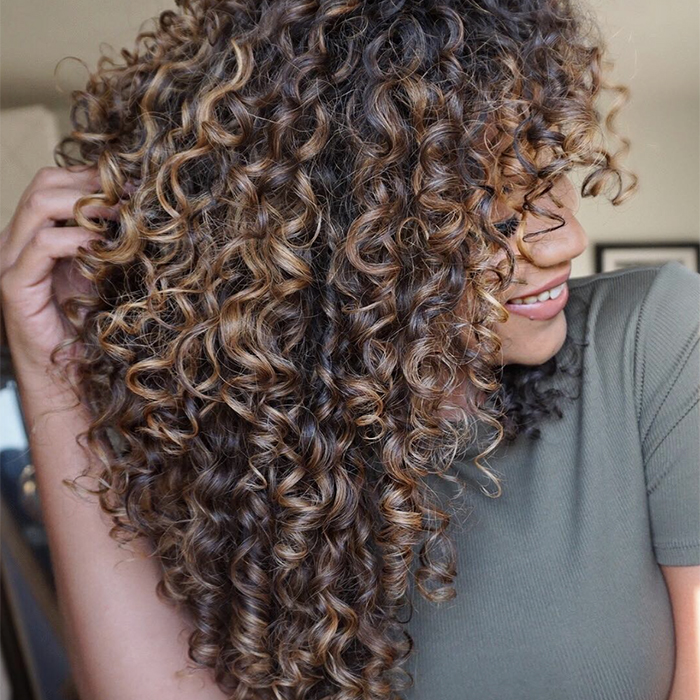
Image:@hif3licia
Any stylist will tell you that layering is the key to putting together an effortlessly chic outfit–but did you know it’s also the secret to defined, natural-looking curls? The LCEG method, a four-step technique that moisturizes, nourishes, enhances, and holds your curls, takes product layering to the next level and spells out exactly how to get bouncy, hydrated, frizz-free hair.
LCEG stands for Leave In Conditioner, Curl Cream, Curl Enhancing Gel, and Hard Hold Gel, and Type 2’s and 3’s can consider it their personal guide to product layering. While four steps may seem like a lot at first, this method is actually super straightforward and easy to follow–but don’t just take our word for it! “I can use conditioner only or leave in and gel and get good results, but for best results, I do the LCEG method,” Rocky of RockynCurls tells us.
Step 1: Leave In Conditioner
Most curlies would argue that leave in conditioner is the most important step of all, since it locks in moisture right off the bat. Instagram influencer, AFROZILLA says, “Leave in conditioner is an absolute must for me. Anyone that transitions to natural hair quickly learns that dryness is ‘Public Enemy #1.’ By using a leave in conditioner on my hair regularly, I’m finally giving my hair the moisture it needs to thrive.”
After washing and conditioning, coat wet hair with a leave-in formula like Dr. Miracle’s Leave In Conditioner, which is packed with Vitamins A, C, and E to soften curls and maximize shine.
Step 2: Curl Cream
Next, run a few dollops of curl cream, like SheaMoisture Coconut & Hibiscus Curl Enhancing Smoothie, through your hair. Model, Alaina King reveals, “It’s my secret to getting moisturized and voluminous curls.” This portion of the LCEG method is essential for defining your pattern and adding a bit of bounce.
Step 3: Enhancing Gel
According to Rocky, “E” can also stand for “extra-special.” She says she incorporates this step into her routine when she’s looking to add ringlets or spirals to her coarse, wavy hair, and prefers an all-natural enhancing gel. She recommends an aloe vera or flax seed version, but the Curling Gel Souflee from Shea Moisture works well, too. If you have Type 3 or Type 4 hair, trust us–you don’t want to skip this! Just add a touch of enhancing gel to wet curls and scrunch, scrunch, scrunch.
Step 4: Hard Hold Gel
To finish off the look, reach for a hard hold gel. This kind of product will serve to hold your perfect, bouncy curls in place and keep frizz at bay, allowing you to go for days in between washes. Some curlies find hard hold gel too crunchy, but with Ampro Pro Styl Protein Super Hold Styling Gel or Jamaican Mango & Lime Locking Firm Gel, that shouldn’t be a problem. Once you’ve run a quarter-sized amount of hard hold gel through your hair (depending on your particular coarseness and thickness”>, turn your head upside down and give your curls a final scrunch to ensure the ideal shape and volume.
All that being said, you may need to tweak the LCEG formula a bit to find the best fit for your curls. “It’s way too much for my hair type,” says Devan Jesmer, the beauty blogger behind @devsday, who creates a “curl cocktail–a combination of curl gel and curl cream” as her final product step, instead. Her favorite mixture involves DevaCurl Ultra Defining Gel, OUAI Curl Jelly, and Kristin Ess Hydrating Curl Defining Creme.
Not sure where to start? If your hair is on the finer side, you may want to skip the L and stick with CEG; those with a tighter curl pattern will do well with an LG or LCG combination; and Type 4’s can get away with just LCE. As Devan says, “The key is figuring out [what] to use for your hair type.”
Of course, nailing the technique and choosing the right products are only half the battle. Once you’ve got the LCEG method down, the question is, how will you dry your newly defined, frizz-free curls?
