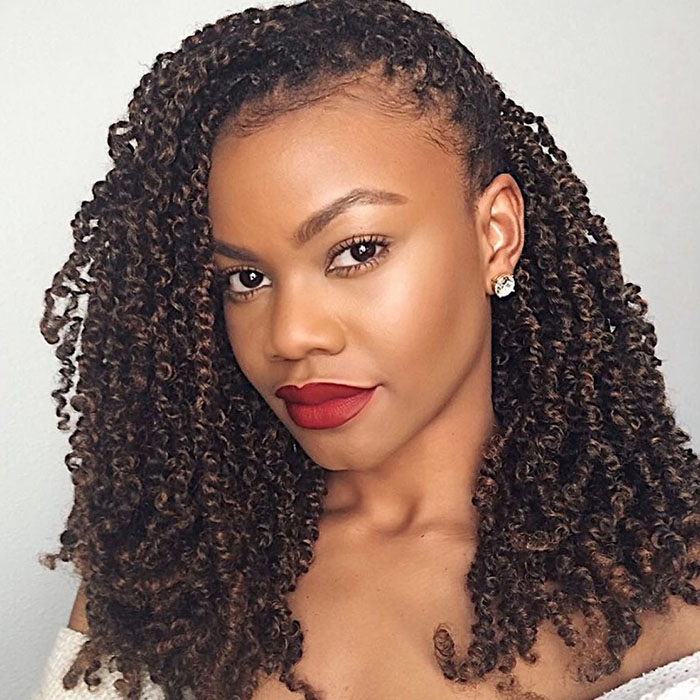
New hairstyles are like seasons, they come and go. But some protective styles like the spring twist will be evergreen in the world of changing trends. Don’t let the name fool you.

Image source: braidsbyaja
What are spring twists?
Spring twists are a natural, protective style that use coily hair extensions to create a springy and twisty hairstyle. It’s different from other twists because of the texture of the hair used to install it. Spring twist hair is a wavy pattern that is thick and has to be separated to create the style. Spring twists are great for every time of year. While installing the style will take resilience, the end result will be sure to wow you.
How to spring twist?
Embedded content: https://www.youtube.com/watch?v=jKGID1iErCg
Source: Tola Revamps
Step 1: Gather your tools
For a successful spring twist, you’ll need some tools that you already have and you may have to purchase new ones.
- Spring twist braiding hair
- Leave in conditioner
- Rat tail comb
- Wide tail comb
- Scissors
- Your favorite hair cream
Step 2: Make sure your hair is washed, moisturized, and blow dried. Remember to use heat protectant before you blow dry your hair.
Step 3: Separate the hair
The way spring twist hair is bundled, all the strands come together to form the pretty pattern. You have to individually separate the hair before you can twist it. Some packages of hair come pre-separated while others do not. Buying pre-separated hair is a bit more expensive but you’ll save time detangling the spring twist hair.
Step 4: Part your hair
The most efficient way to work through natural hair is in 4 big sections, just like your mom used to do it. Some people also make a ponytail and part rows into the hair starting at the bottom. You should do what is most comfortable for you. If you parted your hair into big sections, begin in whichever section you deem section 1. The math is pretty simple when it comes to sizing your twists. The bigger the part, the more hair you’ll use, the bigger the twist. If you want big twists, that’s fine but start small and find the best size for you.
Step 5: Twist it
Depending on the size of your twist, you’ll need about 2-4 strands of separated spring twist hair will be all you need. Grab a good amount of moisturizing cream and apply it to the roots of the small section. Add two pieces of spring twist hair and try to latch it on as close to your scalp as possible. Start braiding the hair into your own for about one inch, then switch to a two strand twist. The braid is just to make sure the hair stays in place. Continue this process all over your head.
Things to remember:
Make sure you’re detangling the hair as you twist so you don’t have a knotted mess by the time you get to the end of the twist. Twisting too tight will take away from the natural springiness of the hair and you don’t want to pull to much hair out of your scalp. The entire process can take up to 8 hours depending on your skill level.
Maintenance
This is a pretty low maintenance hairstyle. When you’re done, simply wear a bonnet or grab your favorite scarf for a pineapple.
Embedded content: https://www.youtube.com/watch?v=8IhdEuQ_TLA
Source: Naturally Engineered
Styling
You can style spring twists just like you would style most braiding or styles with extensions. This video by Hair Dela Creme shows you how to style this cute look.
Embedded content: https://www.youtube.com/watch?v=cc-zWr1iP1A
