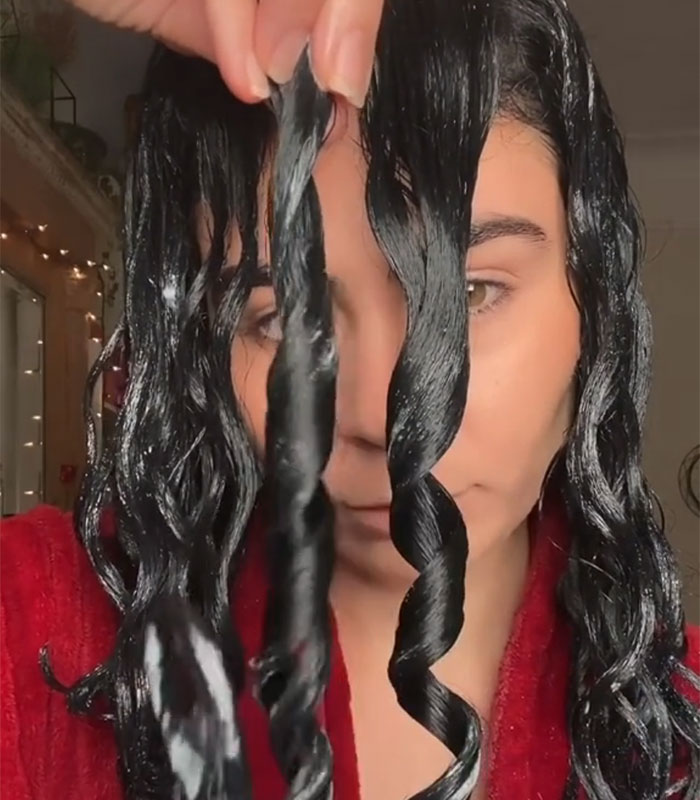
Pictured: @laurs.locks
Have you heard of brush coiling? It goes by many names on social media, including ribbon curling and brush coiling, among others.
What is brush coiling?
The technique involves using a brush handle to create large slinky-like curls on saturated, moisturized hair. I have to admit, it looks like quite a challenge, but the results seem worth the time it might take to practice.
Who should use the brush coiling technique?
Loose-curlies and wavies like it because it makes a consistent curl pattern, and helps to clump and form any errant strands that like to do their own thing. It also locks moisture into the hair and keeps it there. Adding this technique, shown below will stretch out your wash day results, too.
How to brush coil curly hair
@hibastouhi Brush coiling! My curls did not turn out as big and bouncy, but thos little ringlets are super cute! Link in bio for full tutorial #fyp #foryou #curly ♬ abcdefu – GAYLE
You can watch a quick run-through of Hiba Stouhi trying the brush coiling technique on her fine hair above, and watch a full length video on YouTube. If you wish to try this technique on your own hair, follow these tips.
1. Prepare your hair
Start with clean, well-moisturized hair. Generously apply leave-in from one inch from the roots to the ends of your hair. If you have not yet detangled, do so, and section if needed. If your hair is thicker, coarser, or it requires extra moisture, you may also want to use a curl cream. It is important to ensure that you are using products that have a lot of slip so that the brush can glide through the hair. You also want to be cautious about picking products that are not too heavy for your hair.
2. Select the right brush for the job
While any kind of wet brush can work for this, including a Denman or Tangle Teezer, if you have thicker or coarser hair you may want to use a brush that allows you to get a lot of tension such as the Denman. Conversely, if you have finer and/or high porosity hair that breaks easily, a Tangle Teezer is better suited for the job. There is even a version for fine, fragile hair.
3. Detangle
Ensure your hair is detangled as you work through your sections. As you brush through your sections, really ensure that they are detangled from roots to ends. Any knots and tangles will appear frizzy when your hair dries.
4. Coil the hair around the brush handle
Brush the section from roots to ends, stopping at the end. Then roll the hair around the handle of the brush. In order to avoid getting your hair caught in the brush, exercise caution when winding your hair around its handle. If you have a lot of hair, please work in sections.
5. Apply additional water as needed
If your hair starts to dry as you create your ribbons, spritz on more water. Remember, you are going to need tons of slip.
6. Seal your curls with a styler
Once you’ve brush coiled every section, use a gel to lock in your style. Apply it using the praying hands method, and then scrunch in. Gels that work well for this include:
- Jason Flaxseed Hi Shine Styling Gel
- Biotera Alcohol Free Defining Gel
- Ouidad Advanced Climate Control Heat and Humidity Gel
Optional: Diffuse
If you are drying your hair with a diffuser, manipulate the curls as little as possible. If you like to put the diffuser into your hair, gently cup the curls into it and scrunch upwards.
Can brush coiling be done on short hair?
Here is a demonstration of the technique on shorter hair.
Have you tried this technique? How were your results? Let us know in the comments.
